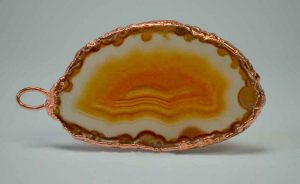
Copper electroforming on stone
Copper electroforming on stone using an agate slice
This project shows you how to copper electroform on stone using a slice of agate as an example. This is demonstrated using our Conductive Paint (UK and EU only), which can be used for electroforming on a wide range of non-conductive surfaces.
The benefit of using this paint is that it is a much quicker option than using our other two conductive inks because the Conductive Paint can be applied without having to first spray on a key layer of lacquer. This is great if you’re intending to selectively electroplate, as you don’t have to do any tricky masking out.
As well as this, it becomes touch dry in 15 minutes and is fully cured by 8hr at room temperature and 1 hour at 60 degrees centigrade.

Stage 1. Surface preparation for electroforming
a) Assembling your kit
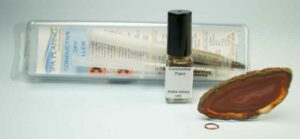
Get together everything you need for preparing the agate slice; this will include the Conductive Paint, The tubes of Conductive Epoxy and a jump ring to hang the agate piece on the chain, once it is electroformed.
At this stage you need to work out the surface area of part of the item you’re intending to electroform. The rim of this slice of agate was estimated at having a surface area of 3.5 cm squared and this was noted for later use. It will also be useful to have your Conductivity Tester to hand, to check that the Conductive Paint and the Conductive Epoxy you’ll be applying is, in actual fact, conductive.
Mix the Conductive Epoxy according to the instructions on the packet.
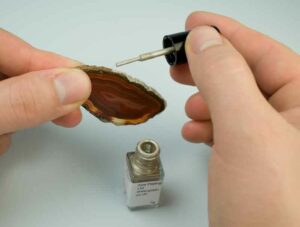
b) Painting on the Conductive Paint
Carefully paint on the Conductive Paint around the rim of the agate slice, using the enclosed brush. Once this is done, either leave to dry at room temperature (25 degrees centigrade) for 24 hours or dry in a fan oven at 60 degrees centigrade for an hour.
c) Using the Conductive Epoxy
To attach the jump ring to the rim of the agate slice, mix up a small amount of our Conductive Epoxy Filler and use this to stick the ring directly onto the dried Conductive Paint. The ring now performs two functions; it allows the piece of agate to be hung from its chain and it also forms the conductive connection that the agate can be held by in the electroforming solution.

Stage 2. Electroforming the agate slice
a) Working out amp settings and electroforming time
Work out the amp setting and electroforming time by entering in the surface area into our online Electroforming Calculator. Then set up your electroforming equipment following the instructions detailed in another section of this manual called ‘Copper electroforming a plastic model soldier‘
b) Using the Electroforming Calculator
The surface area of the rim of this slice of agate is approximately 3.5 cm squared and the required thickness of the electroforming is 100 microns. These details are entered in to our online Electroforming Calculator and this produces an amp level of 0.12 amps and a plating time of 2 hours and ten minutes.

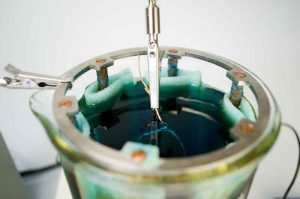
c) Finishing
The finished piece of electroformed agate was taken out at the end of the alloted time and given a rinse. It is now possible to apply other plated layers of silver or gold, for example using either tank or brush plating or a combination of both.