Preparing the surface for electroplating
There are two main stages in preparing the surface of your work for electroplating;
1. The polishing stage
2. The cleaning and /or activation stage.
For the polishing stage you can choose either a) hand polishing or b) machine polishing.
For the cleaning stage there are a couple of routes you can go, depending on the condition and type of surface you're intending to plate. Whichever route you choose, you need to achieve a water break free surface at the end of the cleaning process as this is one of the best ways of ensuring an excellent plating result.
The following guidance is good for all three plating techniques - pen, brush and tank electroplating.
Many problems with electroplating occur because the surface wasn't prepared well enough. Once this stage is sorted, you'll get good electroplating results at the end!

Stage One - Hand and Machine Polishing
a) Hand Polishing
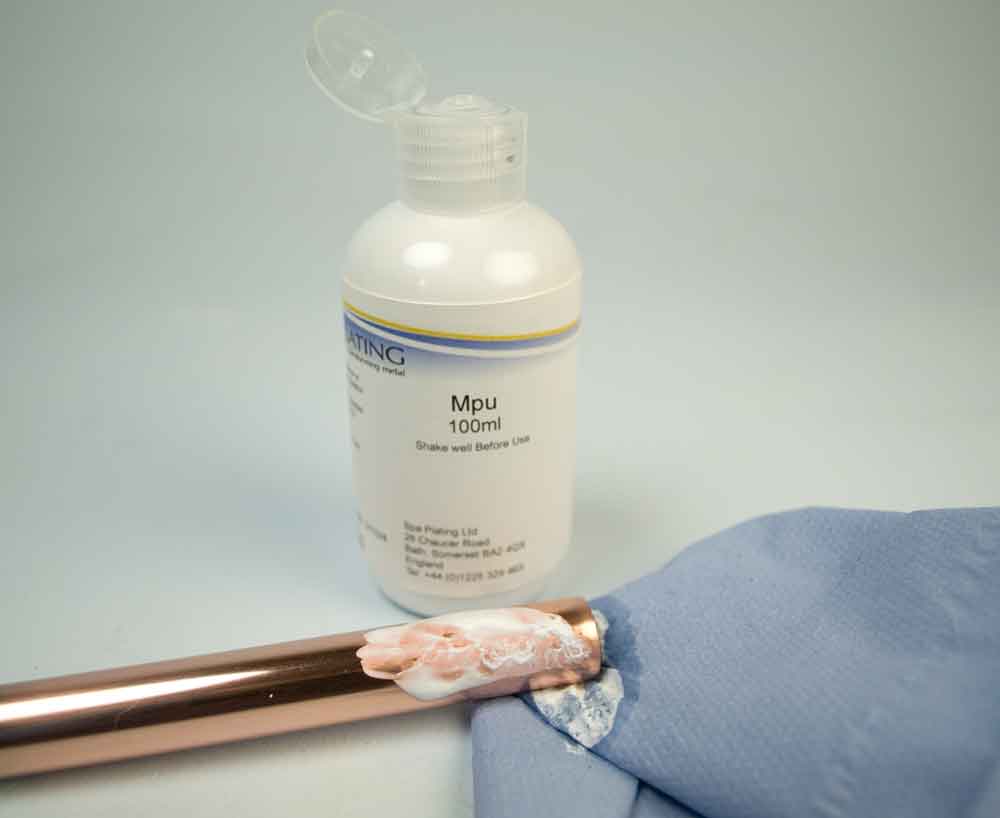
If you’re electroplating small, slightly scratched items, we recommend starting off with an abrasive polish, for example, Autosol. The traces of these types of abrasive polishes will need to be removed with solvent or if this isn’t available you can use our MetaPrep. The MetaPrep or solvent will then need to be removed with liquid detergent and then rinsed very thoroughly under running water. You can then move on to our MPU using tissue paper. For in-depth guidance on hand polishing, please click HERE for our ‘Polishing metal for electroplating’ page.
Stage One - Hand and Machine Polishing
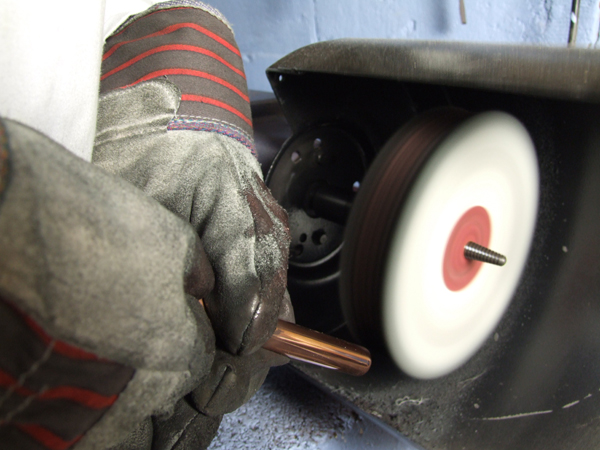
b) Machine Polishing
This approach to polishing is only necessary if the item you’re electroplating is quite large and deeply scratched.
First, some safety advice;
•Wear a visor, gloves and tie loose hair back. Don’t wear loose fitting clothing or jewellery.
•Bring the work up to the mop, using only the bottom section.
You may have to work through two or three stages of polishing, changing mops and corresponding polishing bars. The table below gives guidance on which polishing bar to choose. To see examples of the various mops and polishing bars, refer to the in-depth section on polishing further on in this manual. Once the item is polished, go onto the cleaning/degreasing stage.
| Surface of work | Type of polishing bar | Type of mop |
|---|---|---|
| For very deep scratches | Grey bar | Sisal |
| For medium scratches | Green bar | Stitched |
| For the final polishing | Blue bar | Loose leaf |
Stage Two - Cleaning/Activating
Cleaning means removing all dirt and oil. Activating means removing the oxide layer that builds on metal, particularly with stainless steel, nickel and nickel containing alloys such as nickel silver. You may have to have a separate cleaning and activating stage, if your work is made of stainless steel, nickel or nickel containing alloys.
Here are the steps you need to go through for this stage of the surface preparation process;
If you have machine polished or hand polished with Autosol, clean the traces of polishing compound off with a solvent or MetaPrep and then remove all traces of solvent or MetaPrep with liquid detergent. Rinse off all traces of detergent thoroughly under running water so that no suds remain.
Then if your work is small to medium sized and has a fairly smooth surface and isn’t made of stainless steel, nickel or nickel containing alloys, finish the cleaning/activating stage with MPU. This cleans away all remaining traces of oil and activates the surface at the same time.
However, if your work is made of stainless steel, nickel or nickel containing alloys, is very large or has a very uneven surface, use our ActiClean to clean and activate in one. Use a Carbon Electrode (preferably) or a Platinum Electrode.
A Water break free surface
The ultimate aim of polishing and cleaning/activating is to make a water break free surface, as illustrated in the picture to the right.
On the top half of the copper sheet, the surface isn’t completely clean and so the water is gathering up into droplets and staying on the surface of the metal.
However, on the bottom half of the copper sheet the water has completely drained off the surface as it is completely clean and doesn’t provide anything for the water to cling to or gather around. This is a water break free surface and is ideal for effective electroplating. This should happen after you’ve completed stage 1 and 2 above.
Leave a Reply
You must be logged in to post a comment.