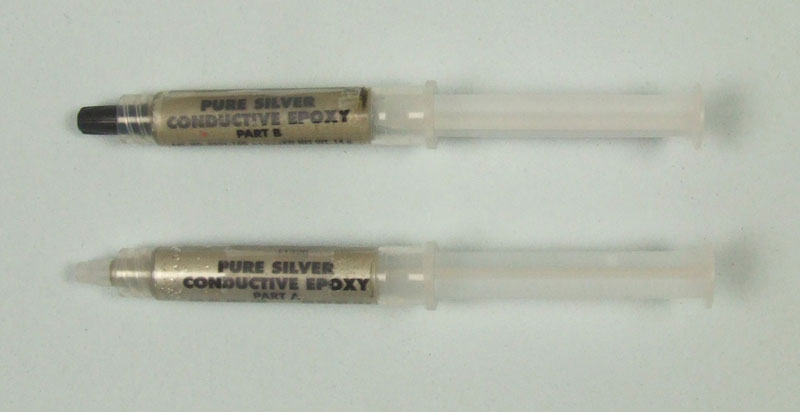
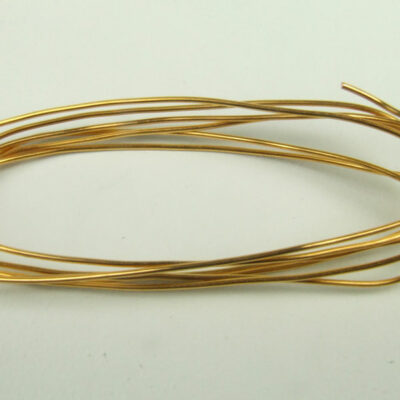
Our Conductive Epoxy is ideal for creating a firm and conductive bond between our Jigging Wire and the item you’re brush plating or electroforming. Can also be used to fill in minor dents in metal surfaces before plating. Sold as 2 x 7g syringes.
Orders outside UK and EU
This item cannot be purchased and shipped outside the UK and the EU because it’s part of our range of plating solutions which are regulated for transport.
Our Conductive Epoxy Resin is ideal for securely fixing jigging wire to non-conductive materials such as plastic in preparation for brush plating and electroforming.
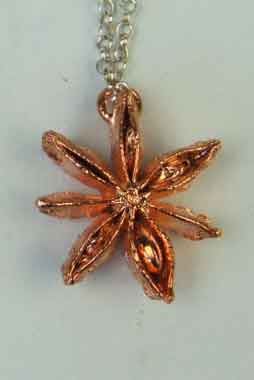
The Conductive Epoxy Filler was used to attach a jump ring to this star anise, thus using the epoxy as a mechanical as well as a conductive joining mechanism in preparation for electroforming with our electroforming solution and equipment. To see an electroforming project that uses this conductive Epoxy, please click HERE.
Features
Benefits
A two part conductive epoxy that can be easily mixed to the required amount.
A little goes a long way and Part A and Part B will keep a long time in their separate syringes.
Multi-functional
It can be used for both conductive and mechanical bonding. For example it can be used to stick jump rings to our Conductive Paint once it is dry and then electroformed on top, forming and strong mechanical bond without soldering. This can make it an easy and quick option when manufacturing electroformed items
Our Conductive Epoxy is ideal for creating a firm and conductive bond between our Jigging Wire and the item you’re brush plating or electroforming. It’s great for plating and electroforming on non-conductive materials. Can also be used to fill in minor dents in metal surfaces before plating.
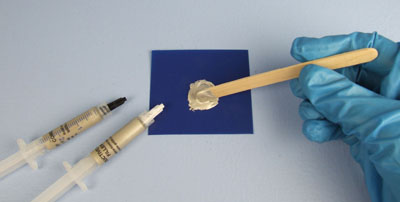
1. What you'll need
Syringes of A and B Conductive Epoxy, a small square of plastic and a mixing stick.
2. Mixing conductive epoxy
Squeeze out an equal amount of A and B and mix with the mixing stick. Remember to put the right cap back on the right syringe, immediately after use!
3. Using the Conductive Epoxy
Place a small amount of the mixed Epoxy where you would like you jigging wire to join the item you’re elctroforming. With the electroformed agate example to the right, the copper jump ring was stuck to the Conductive Paint with the Conductive Epoxy after the paint had been applied to the rim of the slice and had dried. The jump ring could then be used as the elctrical connection for electroforming, as well as acting as the mechanism for hanging the agate slice on its silver chain.
Setting times for the Epoxy will vary according to the temperature you are working in. They are as follows; at 24ºC – 4 hours, 65º – 10 minutes. Once you have mixed the Epoxy, use within 10 minutes. Once the Epoxy is fully hardened, you can smooth it down with wet and dry paper. Start with a grade 600 then move up to 1000 and finish with 1500.
You need to use water with the paper and a little soap increases the fineness even more. You can then machine polish to achieve a perfectly smooth result. Please refer to the pages on machine polishing in our manual for guidance.
4. Plating and electroforming
Once the Conductive Epoxy Resin is fully set and you’ve done any necessary sanding, you are now ready to plate over your join. If you’re brush plating, we recommend plating a layer of PP Copper first, then a barrier layer of white bronze or nickel if you wish to gold plate or if you intend to silver plate you don’t need a barrier layer and you can plate straight after with silver.
If you’re planning on electroforming, please see the section on electroforming in this manual.
Cure time at 22 °C: 6 hours
Cure time at 60 – 70°C: 20 minutes
Volume resistivity: 0.0003 – 0.0009Ω/cm
Hardness (Shore): 72 – 78
Some items are regulated for transport and can only be delivered to destinations in the UK and countries within the EU. Alternative or substitute products are detailed in the ‘Description’ tab of this tabbed panel or under Related Items below this tabbed panel.
For all price quotations for deliveries, please add your items to our shopping cart. You will be able to see the shipping costs by clicking on the ‘Calculate shipping’ button in the cart and before checking out.
You can access our MSDS by scanning the QR code which is on our product bottles.
Here is a video to show you how;