How to use our Battery Powered Plating Pen
Using our Battery Powered Plating Pen for portable pen plating
Our Battery Powered Plating Pen is powered by long-life batteries which means it has no need for a separate power source. This makes it completely portable and easy to set up and store. When the batteries run out you can easily replace them - no need to throw the plating pen away and buy another one.
It is ideal for plating small areas such as jewellery and electrical items for example PCBs and electrical connectors on plugs.
It can be used for brush plating as well as pen plating, with the addition of one of our short electrodes and short swabs.
This plating pen can be used with our Rhodium Pen Plating Solution, as well as most of our Coloured Metal Mixers such as rose and green gold.
Because of its relative ease of use and flexibility, it is an excellent choice for those getting started with small scale electroplating.
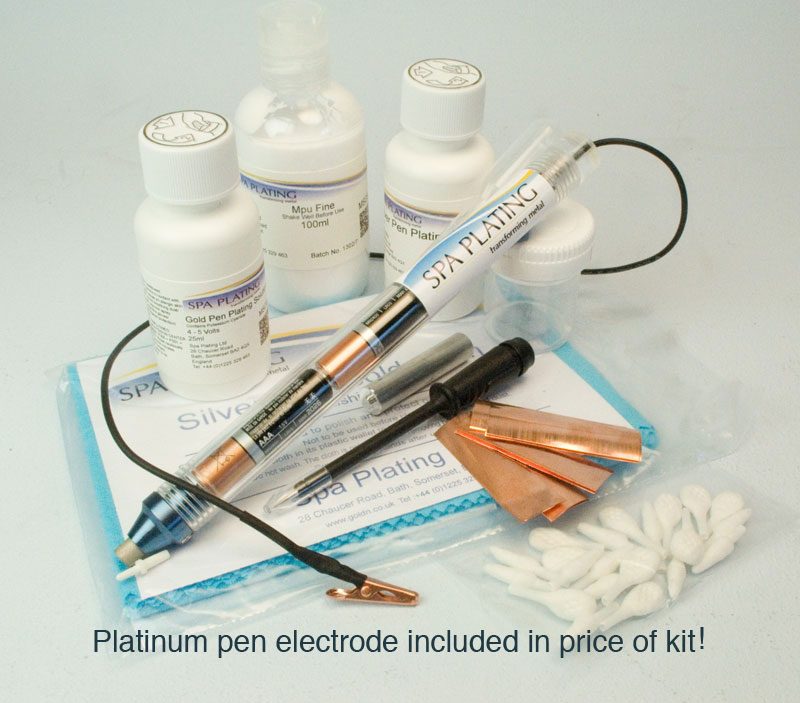
1. The complete Battery Pen Plating Kit
Each of our Battery Powered Pen Plating Kits include, along with the pen, Gold and Silver Pen Plating Solution, Nibs, MPU, a Beaker, a Mini Contact Probe and Conductor Strips.
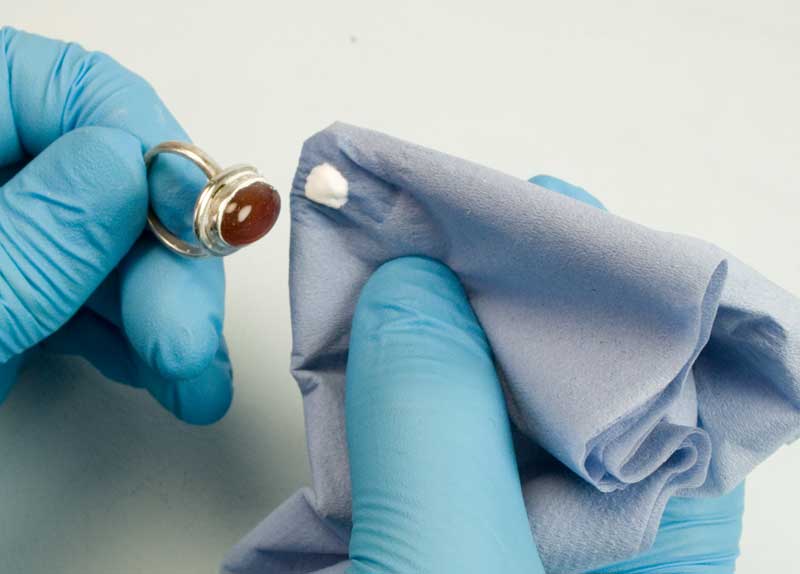
2. Preparing the surface of your work for pen plating
The surface of your work must be free of tarnish, oxides, dirt, grease and to be water-break-free to ensure a good plating result. To achieve this, use a little of the MPU on a piece of tissue paper and rub the surface of your work until the metal is shiny and you can see the true colour of the metal clearly. Please click here to see a guide on achieving a water break free surface.
To the right you can view a video of the battery pen being used to gold brush plate on silver clay. The battery pen is multi-functional. With the addition of a short electrode and short swab it can also be used to brush plate. The Battery Powered Brush and Pen Plating Kit includes both pen and brush plating attachments for complete flexibility.
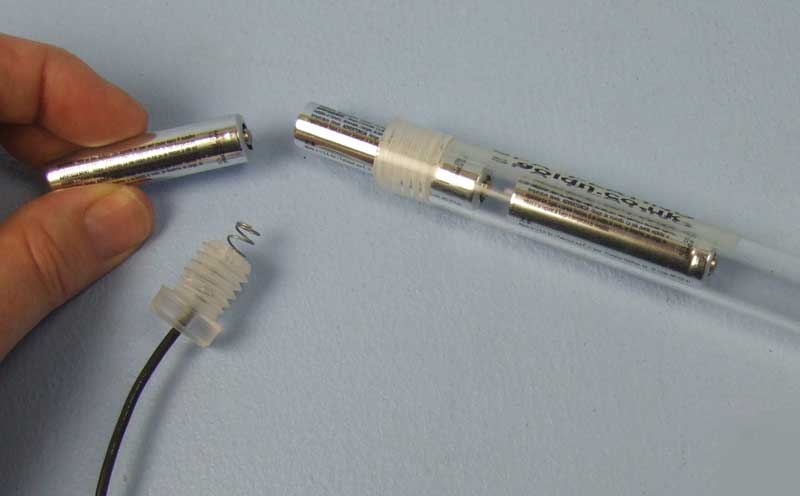
3. Preparing the pen
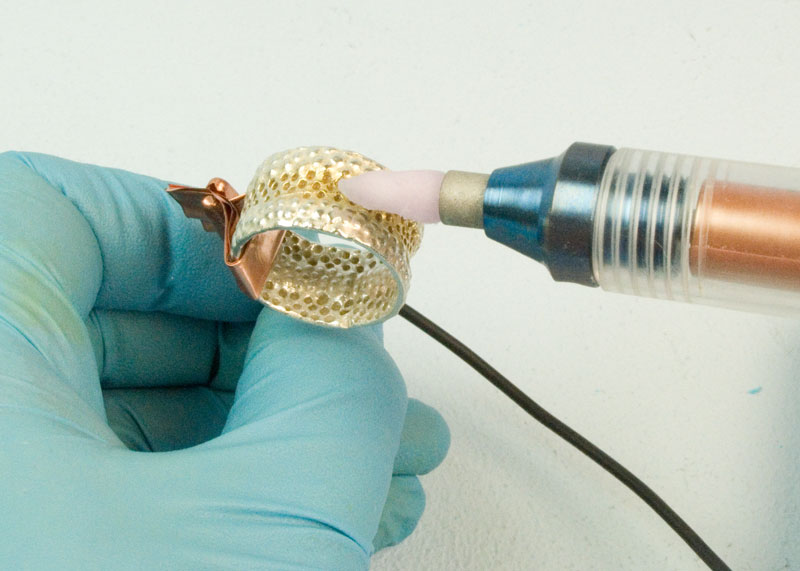
This is how your pen should look once it is set up. The work is held in one hand and the nib in the other end of the pen (dipped in the gold Pen Plating Solution) is gently stroked over a small area of the surface of your work. This completes the electrical circuit and gold plating takes place.
Note that the ring is not being directly held by the crocodile clip; the electrical circuit is made by the conductor strip (grasped by the crocodile clip) being held in contact with the work. This stops the steel teeth of the crocodile clip scratching the surface of your work.
The next few steps will take you through in detail how to set up your pen.
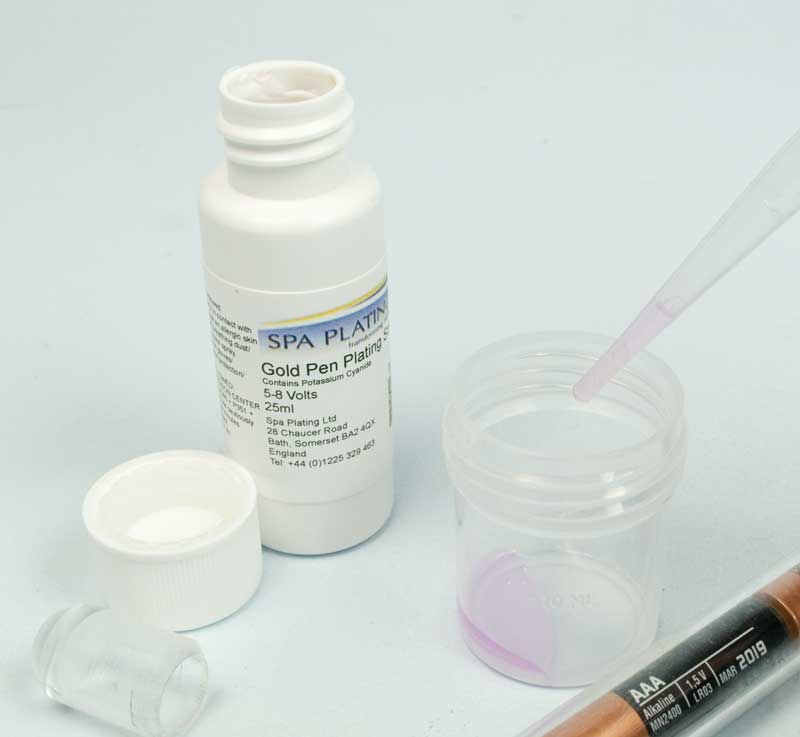
4. Preparing the plating solution
Measure out the amount of solution you need with your pipette and put it into your beaker. To work out how much plating solution you need, go to our Plating Calculator which you will find on each of our product pages. Just enter in the size of the area you want to plate and how thick you want your plated layer to be and the Calculator will tell you how much plating solution you will need and how long you’ll need to plate. You will then be able to work out in advance how much it will cost to plate your item.
Do not try to dip the pen directly into your bottle of solution as this will mean the next time you want to plate a different item, the solution in your bottle will have a lower concentration of gold and it will take longer for you to achieve a required thickness of gold plate. You will also find it impossible to use the Plating Calculator accurately and you won’t be able to estimate how much it cost to plate the item.
5. Inserting the nib into the anode
Insert a nib into the small hole in the electrode of the pen. Make sure the nib is fully pushed down into this hole and the bottom of the nib is in contact with the anode.
Dip the nib into the pen plating solution. Make sure the nib is fully soaked in the solution, otherwise there won’t be a complete electrical circuit when you come to plate and no plating will take place.
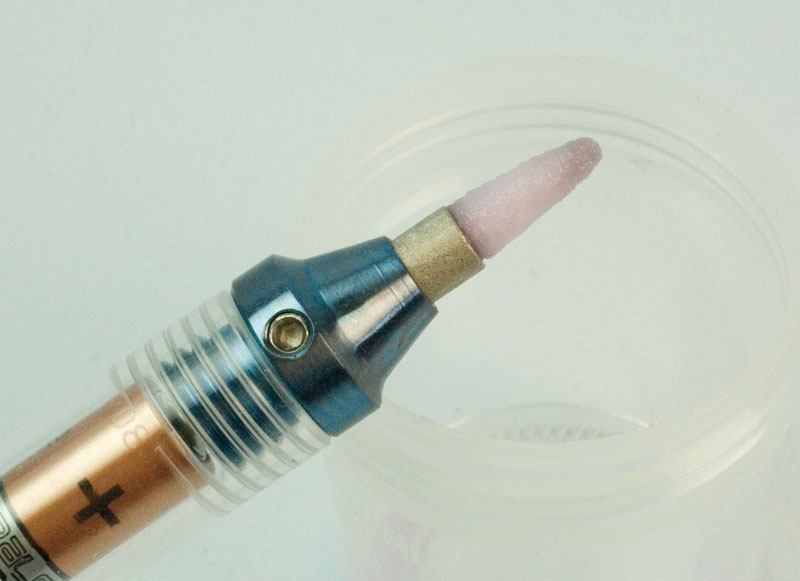
6. Dipping the nib into the pen plating solution
6. Pen plating
Now start pen plating by gently stroking the nib over a small area of your work with regular, circular movements. Keep dipping the nib in the plating solution at frequent intervals to replenish the gold in the nib. Remember to set your timer to the time the Plating Calculator gave you for plating to your required thickness. You need to have plated the whole of the surface of your work in this time.
Once you have finished plating you can bring out the final lustre of your work and partly protect it from tarnish by applying our MetaSeal with some clean tissue.
7. Rhodium pen plating
As mentioned in the introduction, The Battery Powered Pen Plater can also be used with our Rhodium Pen Plating Solution. A slightly different approach to setting up the pen is required, because of the different composition of the Rhodium Pen Plating Solution and the Fibre Nibs that have to be used with it.
Draw out the required amount of solution from the bottle using a pipette and transfer it into the glass beaker that is supplied with our Batterery Powered Rhodium Pen Plating Kit. Using the tweezers supplied, place the fibre nib into the rhodium solution and let it soak for at least an hour so that the rhodium solution completely permeates into the fibre nib. After an hour, using your tweezers, place the fibre nib into the end of a pen. It is essential to use the tweezers as using gloved hands would cause contamination of the pen plating solution.

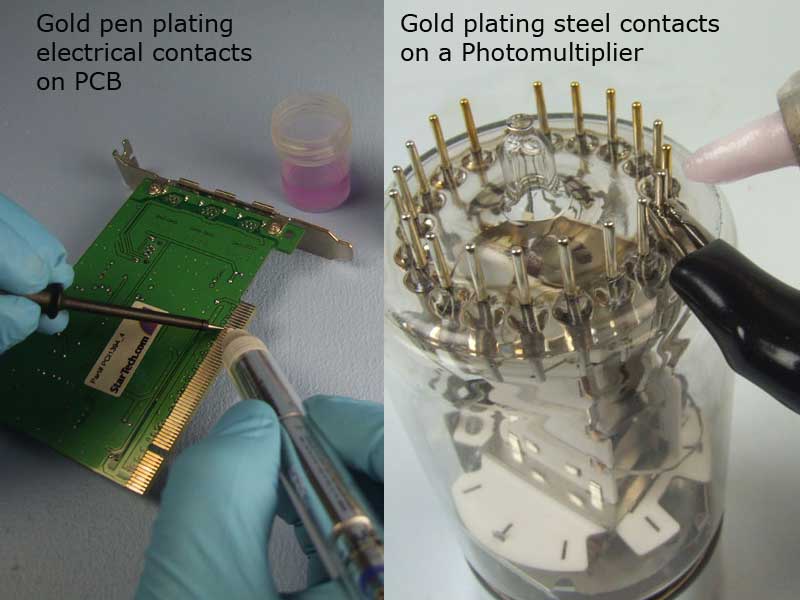
9. Functional applications
The Battery Powered Plating Pen is ideal for spot plating of electrical contacts on such items as PCBs and Photomultipliers. To connect the Mini Contact Probe to the black lead coming from the pen, just grip the wide end of the Probe with the crocodile clip.
10. Pen Maintenance
Please click HERE for a guide on how to maintain your battery powered plating pen.
Leave a Reply
You must be logged in to post a comment.