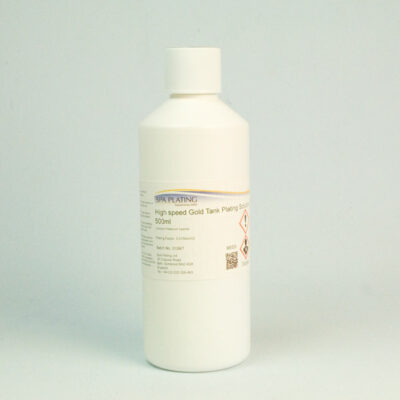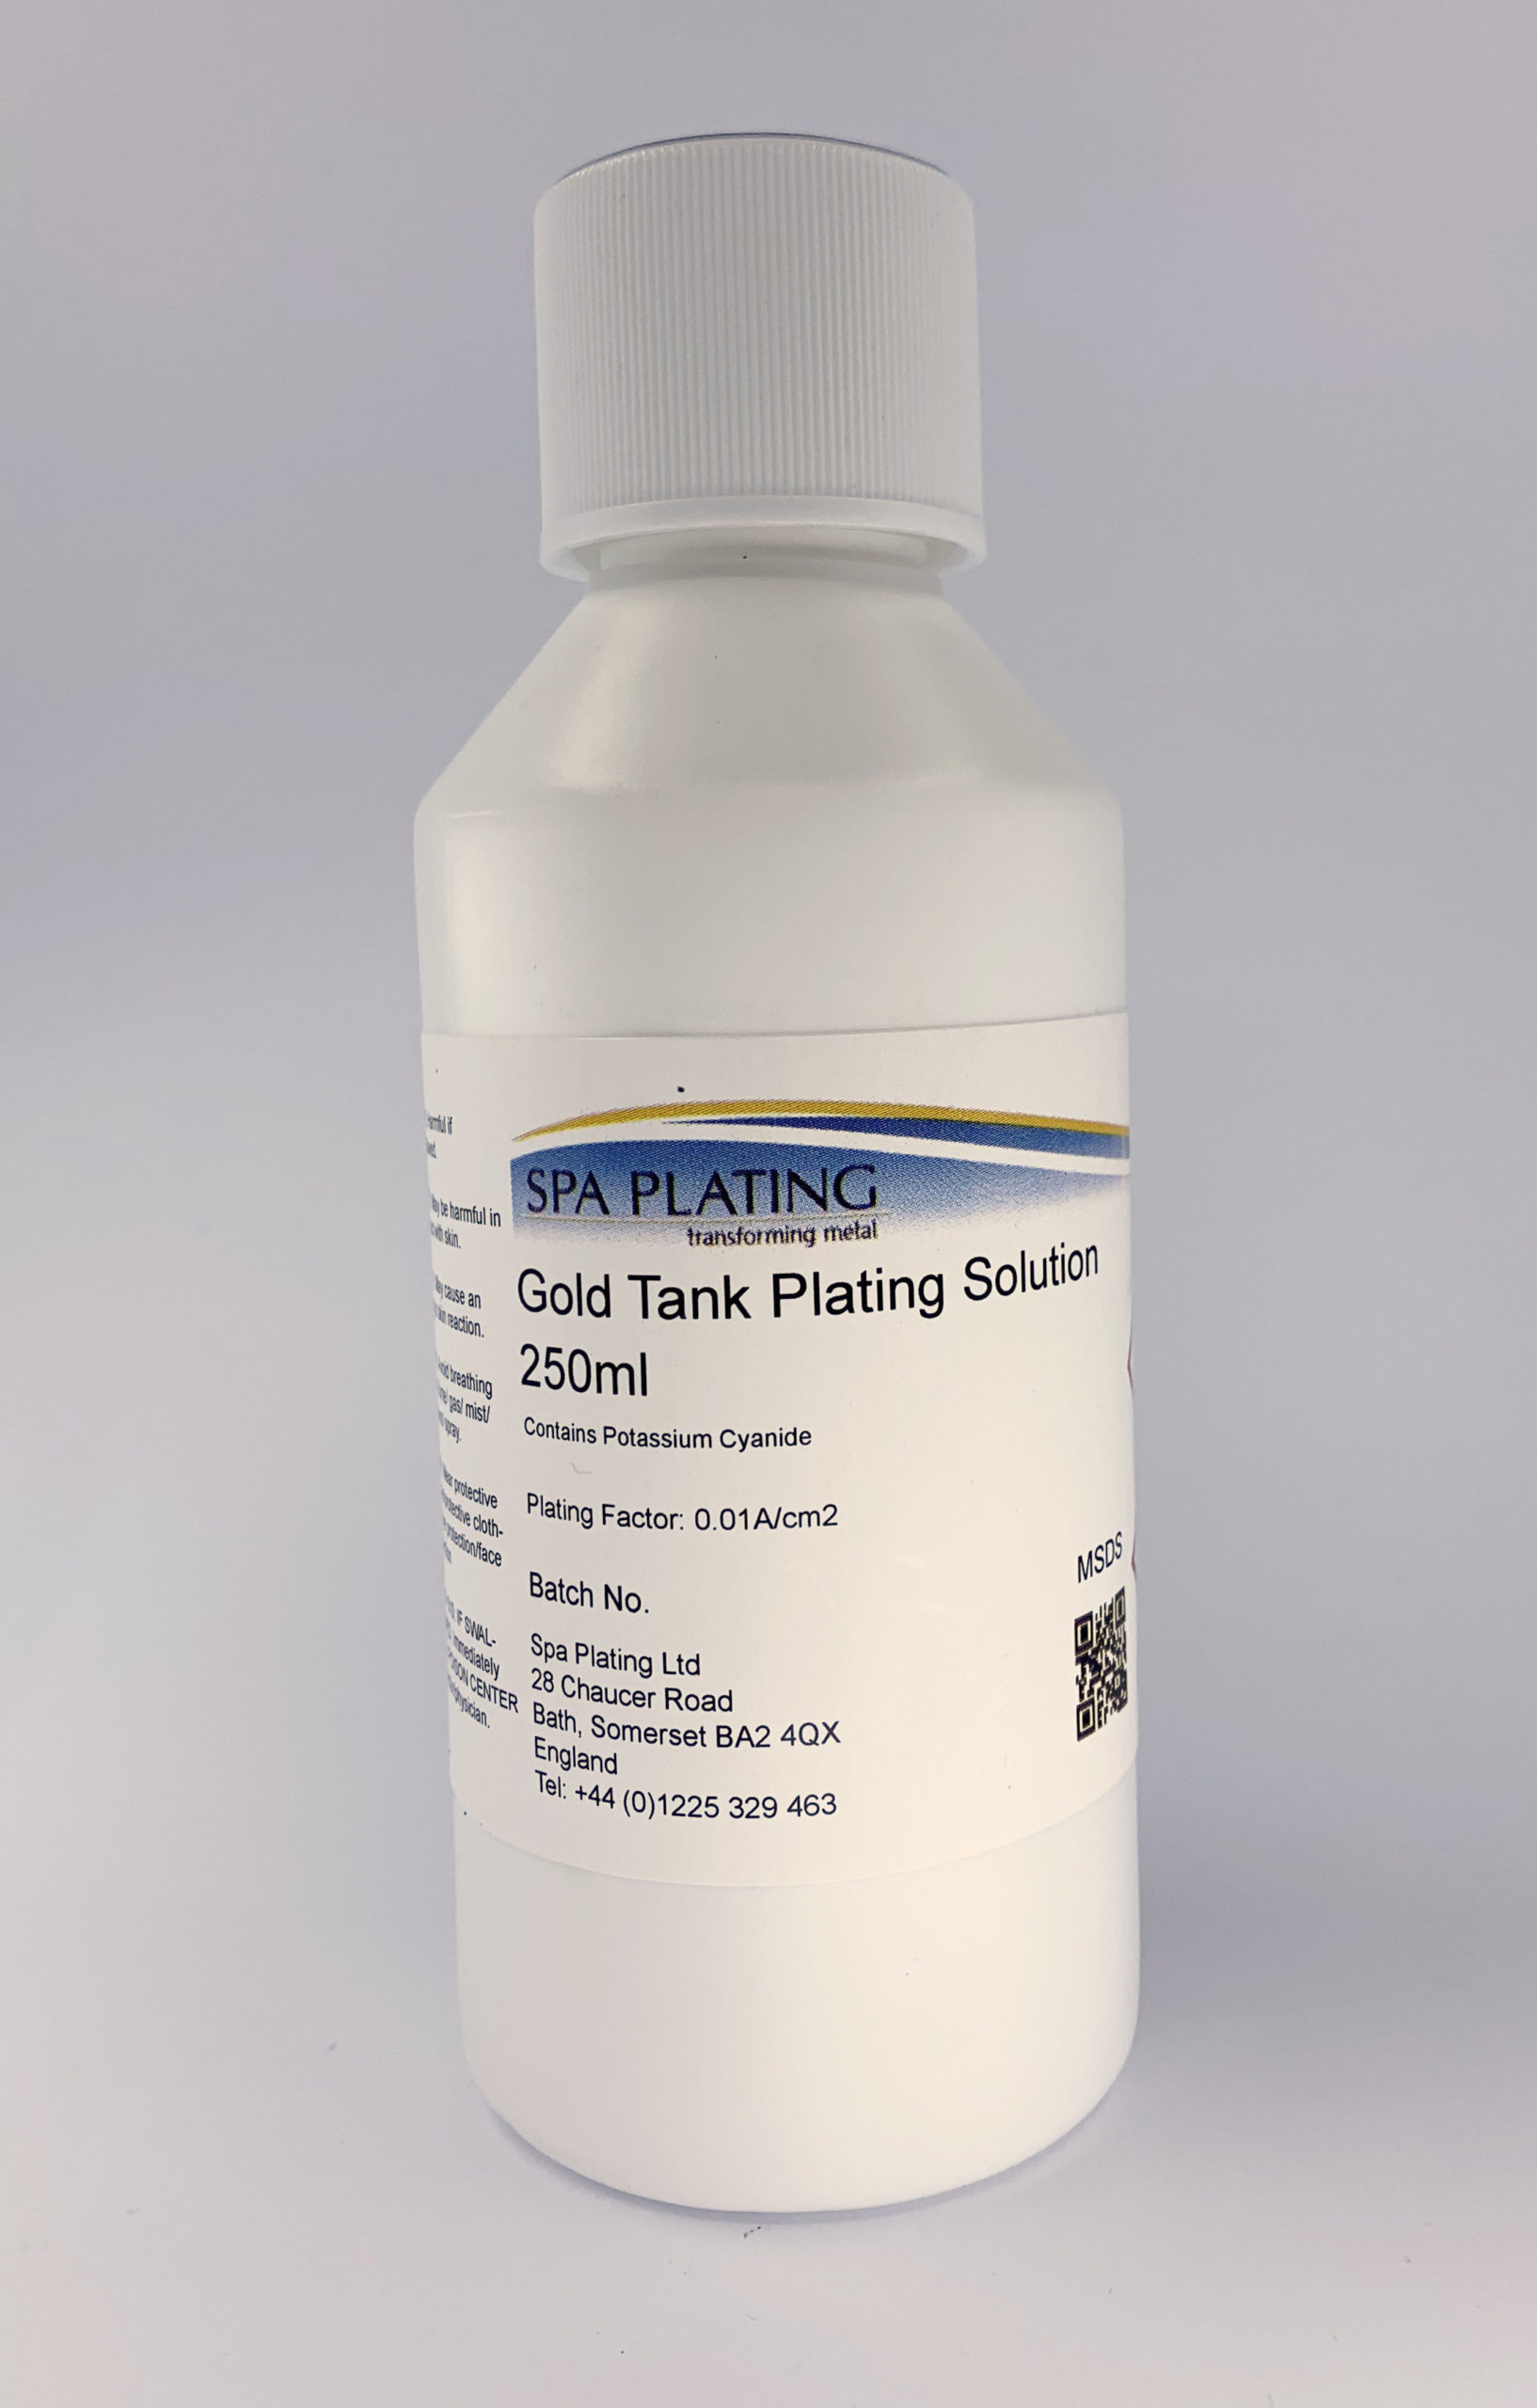
Our Gold Tank Plating Solution contains 4 grams of gold per litre. It is made specifically for tank plating and gives consistently bright results.
HS Code: 3824 99 70
£105.68 – £3,352.79 + VAT
Our Gold Tank Plating Solution contains 4 grams of gold per litre. It is made specifically for tank plating and gives consistently bright results.
HS Code: 3824 99 70
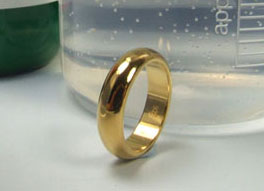
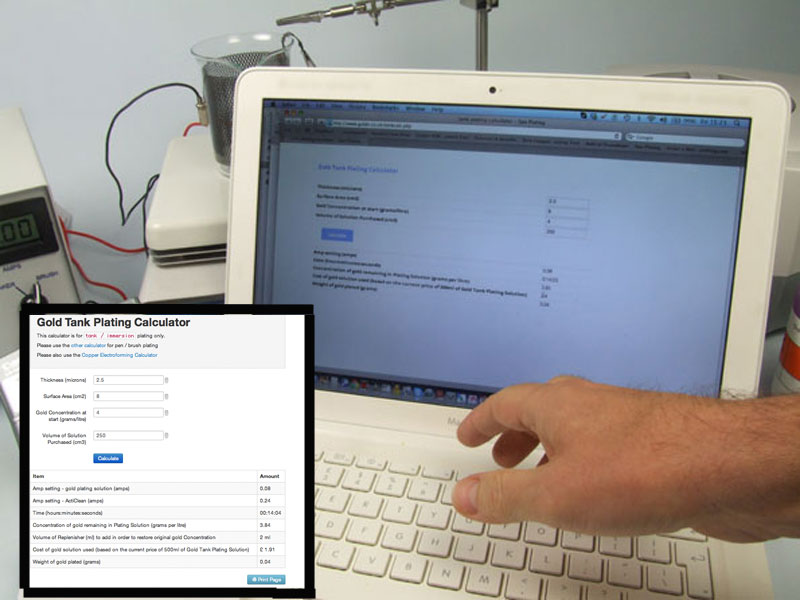
Because our Gold Plating Solution for tank plating contains 4g of gold per litre, it is very flexible and can be used to gold plate on sterling silver to vermeil standard (a gold thickness of 2.5 microns) as well as plating thin, decorative gilding layers of 0.1 – 0.2 microns. All you have to do is enter in the surface area and the thickness of plate you require into our Plating Calculator, which can be found on this page to the right of this panel, and plating times for whatever thicknesses you need are worked out for you. The ring in the photo has a surface area of 8cm squared and took 14 minutes to plate to a thickness of 2.5 microns. If only a layer of 0.1 microns was required then the ring would have only needed 33 seconds immersion in a 250ml tank.
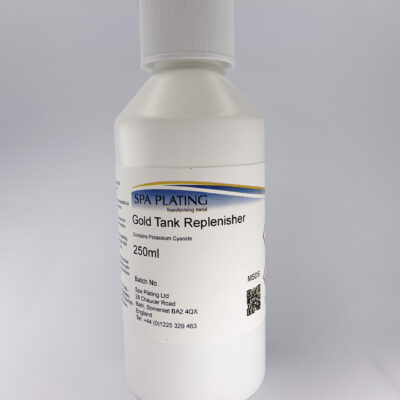
Once you have used your gold plating solution to plate to particular thicknesses you will need to check you have enough gold left in your solution. You can use our Gold Tank Replenisher to keep the concentration of gold in your solution topped up. Here is a link to our Gold Tank Concentration Calculator that will help with replenishing your gold.
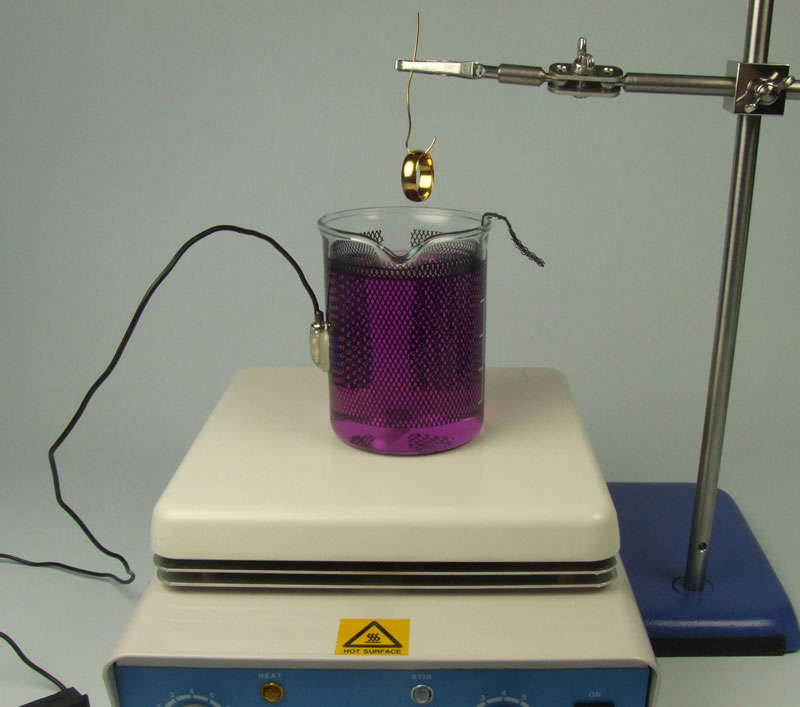
Our Gold Tank Plating Solution being used to gold plate a sterling silver ring. For more guidance on how to use our tank plating solutions and equipment, please see the relevant guides in our Manual by clicking HERE and visit our Gold Tank Plating Calculator to work out how much plating solution you’ll need.
| Features | Benefits |
| Formulated specifically for tank plating | Plates consistently bright over a range of operating conditions |
| Designed to be used with our online Gold Tank Plating Calculator | You know in advance not only how much gold you’ll be plating but also how much gold will be left in the gold solution. |
Our Gold Tank Plating Kit, when used with our on-line Gold Tank Plating Calculator, means you’re now in complete control of the gold plating process.
Plating to vermeil standard requires a layer of gold of at least 2.5 microns on sterling silver and our kit will help you plate to these kinds of specific and substantial thicknesses of gold.
You’ll not only be confident that the layer of gold you’ve plated is of a uniform thickness, you’ll also know how much gold is left in your remaining plating solution and therefore how long it will take to plate your next item to the same or a different specification.
Our kit also offers you the flexibility of plating larger objects in our 500ml, 1 and 2 litre capacity Plating Beakers.
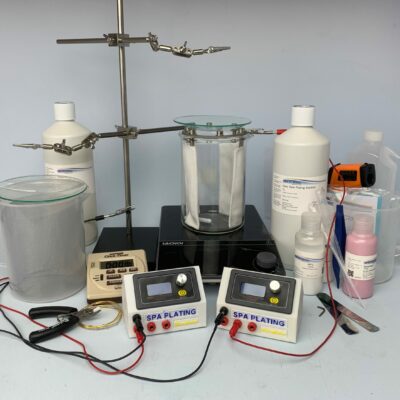
Set up your Gold Tank Plating Kit as shown.
Below is a video showing you how to set up the power source for this kit, the Microplater Classic.

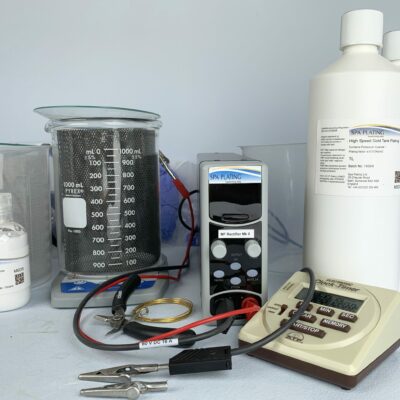
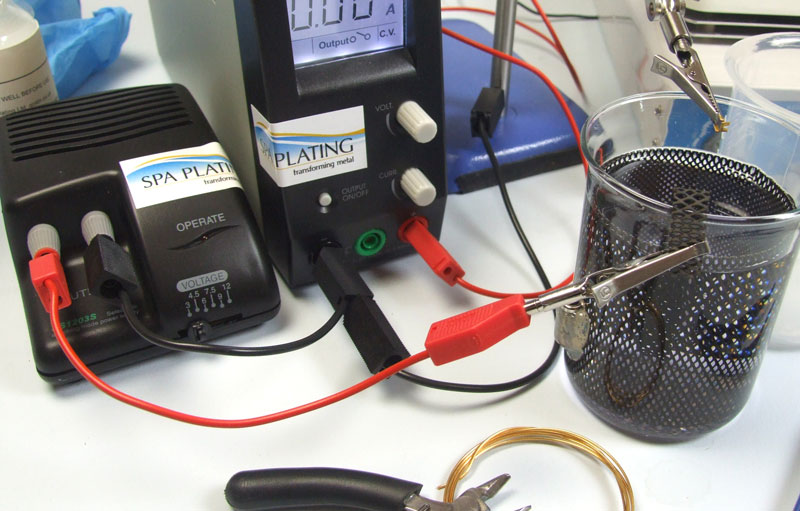
Once the plating beaker is filled with gold solution and is on the hot plate stirrer, grip one of the red leads to its mesh electrode.
Turn on the Electronic Stirrer and place the magnetic stirrer bar in the gold plating solution. Set the hot plate stirrer bar speed to 1 and the heat setting to between 0 and 1. You are aiming to heat the gold plating solution to 25 to 30 degrees centigrade, so you will need to adjust these settings as you go, to maintain a constant temperature. Check the temperature of the solution with the Temperature Probe.
The other red lead should grip on to the mesh electrode in the cleaner beaker.
The black lead should be plugged in to the base of the Plating Stand.
The other ends of the red and black leads should be plugged in to the MF Rectifier.
You’ll need to work out the surface area you’re plating and decide the thickness of plate you require.
In this case we’ll be plating gold onto a sterling silver ring to vermeil standard. This means we’ll be plating to a gold thickness of 2.5 microns. The surface area of the example ring worked out at 8 square centimetres.
Go to the Gold Tank Plating Calculator on the Gold Tank Plating Kit shop page and enter in the required data. Press the ‘Calculate’ button and take a note of the results.
Based on the above data, the amp setting on the MF Rectifier for gold plating will be 0.08 for just over 22.09 minutes.
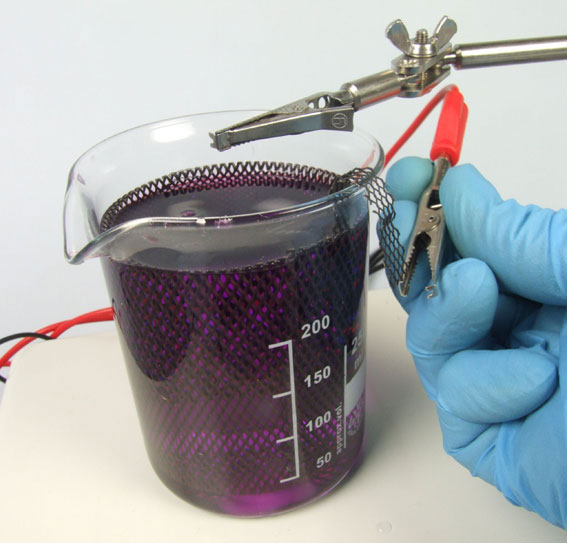
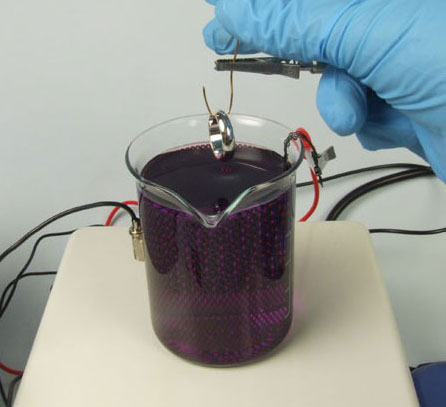
Set the Economy Rectifier to 3 volts for cleaning.
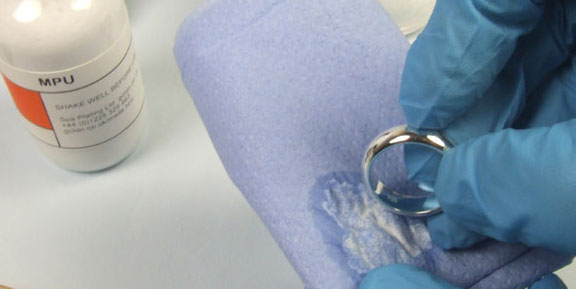
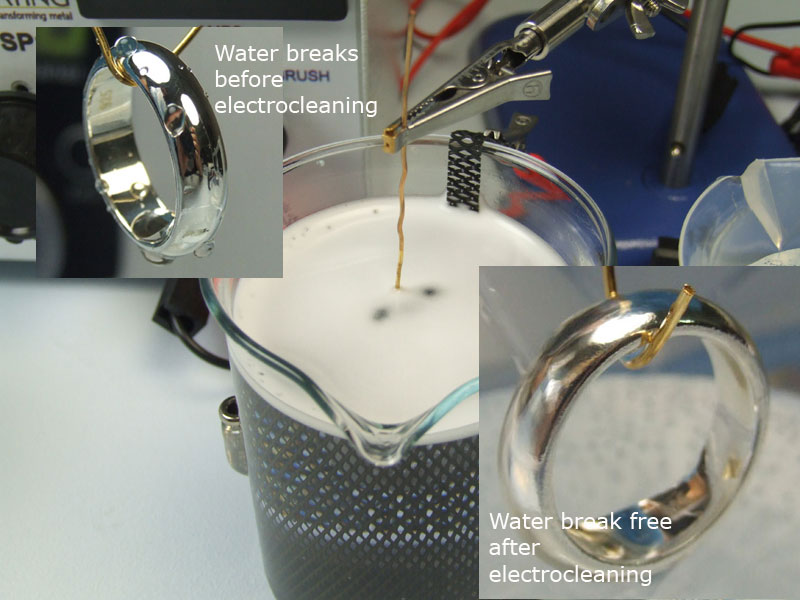
First clean the ring with MPU using a soft tissue. Then make a small jig to hold the ring, using the Gold Plated Jigging Wire and the Wire Cutters.
Hang the ring on its wire jig in the Ultrasonic Cleaner and turn it on – a couple of minutes should be enough.
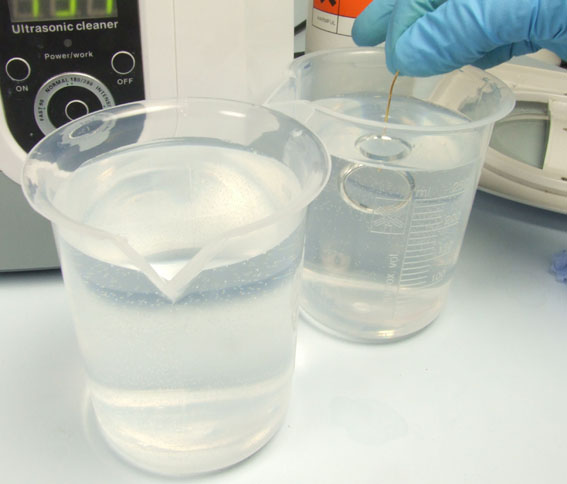
Briefly dip the ring into the first and second of the six rinse stages. The water you use can be ordinary tap water for 5 out of 6 of the rinse stages; we recommend for the last 6th stage that you use deionised

The Gold Tank Plating Calculator has told us that the amp setting for the gold plating stage should be 0.08 amps. For the Cleaner stage, the amps on the MF Rectifier should now be set to 0.8
Leave the ring in the Cleaner for 2-5 minutes. Once it’s done, take the ring out of the Cleaner and pass it through rinse three and four of the six rinse stages.
Adjust the rectifier so that the amp reading is 0.08
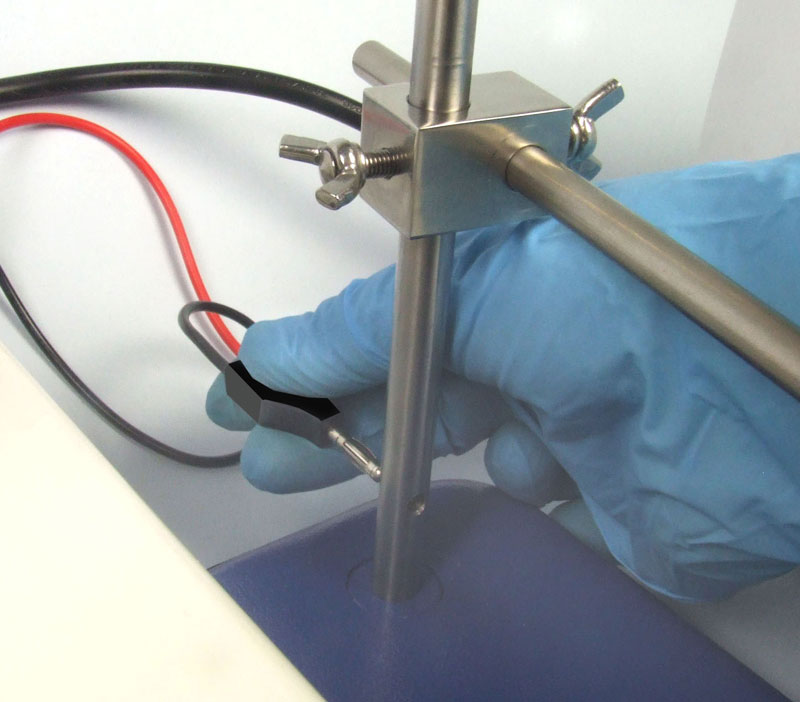
Grip the wire jig (with the ring hanging from it) in the crocodile clip that’s fixed to the arm of the plating stand.
Make sure the Plating Timer is set to the right time (in this case 14.04 minutes) and start the timer as soon as you lower the ring into the plating solution.
After the plating has finished, take the ring out of the plating solution and pass it through the two remaining rinses.
We recommend that the last rinse should be deionised water.
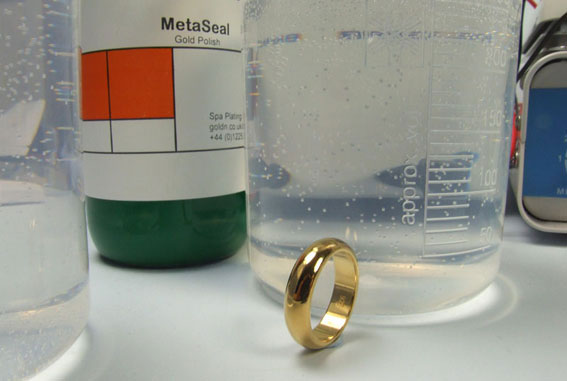
The gold plated ring can now be finished with MetaSeal to bring out the lustre of the plate and help seal its surface.
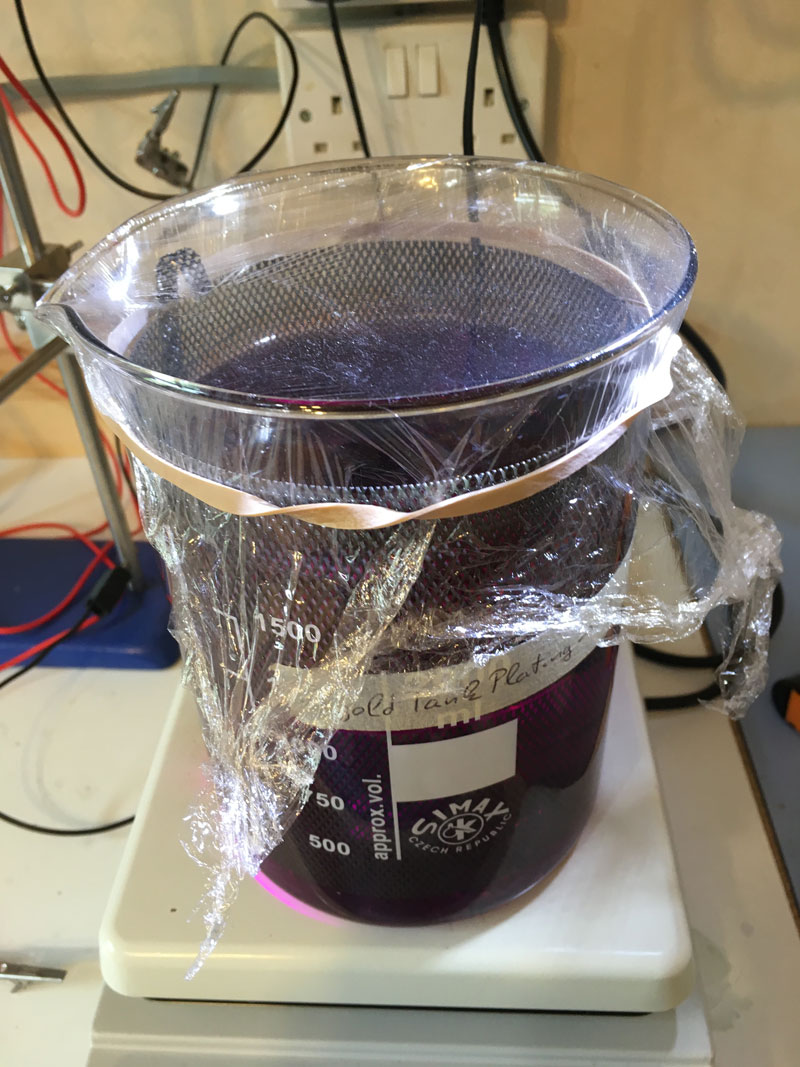
To maintan the plating solution in best working order, cover the beaker with cling film between uses. This will prevent dust and fine hairs getting in and reducing the eficiency of the solution. If you’re not going to be using the solution for more than three consequetive days it is best to re-bottle it.
At some point it’s also a good idea to filter your solution. Guidance on this can be found on the filter kit product page HERE.
How to use this calculator :
1. In the first box, enter the thickness that you want to plate to in microns (thousandths of a millimetre).
2. In the second box, enter the surface area of the article in square centimetres (cm2).
3. In the third box, enter the gold concentration (for a new solution that’s 4 grams per litre).
4. In the fourth box, enter the speed at which you want the gold to plate (microns per minute).
5. In the fifth box, ender the volume of solution purchased (ml).
6. Click the ‘Calculate’ button.
7. Read off the amp setting for your rectifier and the plating time.
8. Amp-hours (Ah) and Coulombs are quoted in the next two boxes. These should be used if you’re monitoring the process with the MicroPlater (in Amp-hour mode) or using our Coulometer.
9. Temperature and agitation are quoted in the following two boxes.
10. The concentration of gold remaining and the volume of replenisher to add is shown in the next two boxes.
11. The cost of solution used and weight of gold are shown in the final two boxes.
Operating Conditions and Deposit Data
| Plating Factor | 0.01 A/cm2 (see notes) |
| Plating rate | 0.15 micron per minute at 0.01A/cm2, 20°C and low agitation ( see notes) |
| Maximum plating thickness | 4 microns |
| Temperature | 18 – 40 °C (see notes) |
| pH | 4.3 – 4.5 |
| Gold concentration | 4 grams per litre |
| Turnovers to exhaustion | 20 – 24 grams of gold added per litre |
| Agitation | Low to vigorous (see notes) |
| Electrode | Mesh or Platinum Rod Electrode (preferably bagged) |
| Gold content in plate | 99.9% (balance carbon) |
| Cathode efficiency | ~25% at Plating Factor = 0.01A/cm2 |
| Hardness | 190 – 210 Hv |
| Density of deposit | 19.3 g/cm3 |
| Stress | Medium |
| Special storage requirements | Away from sunlight |
| Shelf life | 1 – 2 years |
| Health and Safety classification | Harmful |
| Special considerations | Contains potassium cyanide (0.15%) |
| Transport (UN number) | None: Not classified as dangerous for transport |
Notes:
Certain small items, for example Swabs, Nibs and Plating Pens can be sent by normal post within the UK
For all price quotations for deliveries, please add your items to our shopping cart. You will be able to see the shipping costs by clicking on the ‘Calculate shipping’ button in the cart and before checking out.
Please click on the link below to download the SDS for this product: