Gold brush plating silver
Gold brush plating on textured silver
Gold brush plating on to silver is one of the most straightforward of brush plating processes. The skills set out in this project will be the basic skills necessary for all other brush plated finishes and so it's an important project to study, even if you're not intending to plate gold but other finishes, for example silver or copper.
The project demonstrates gold plating on silver that's been given a scratch brushed finish. It is sometimes more challenging to plate effectively on a matt surface, but you'll find our preparation compounds MPU and MPU Fine very effective in overcoming any problems that may arise by plating on these finishes.
Please note: The Rectifier shown in this project has now been discontinued and replaced by the MF Rectifier Mk II.
1. What you'll need
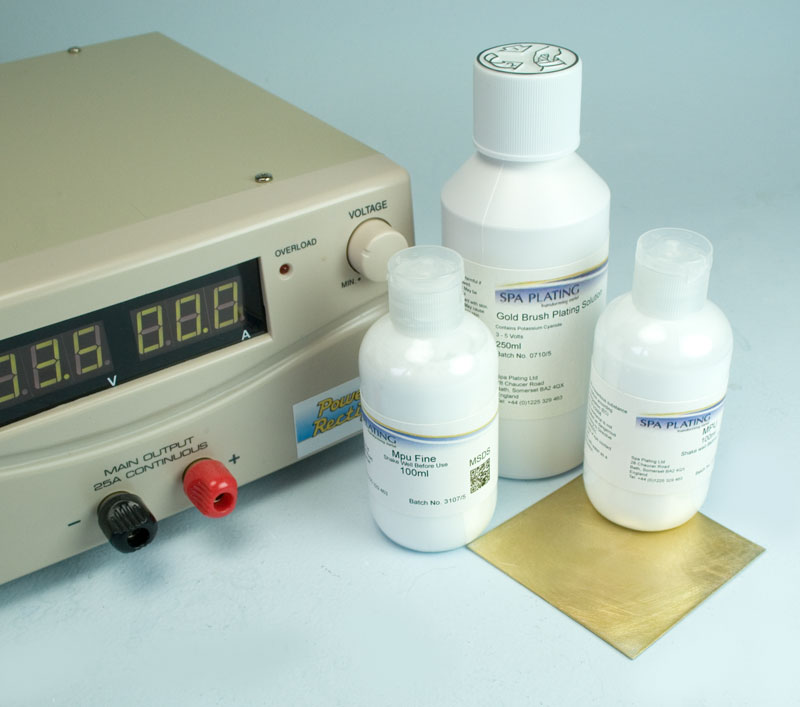
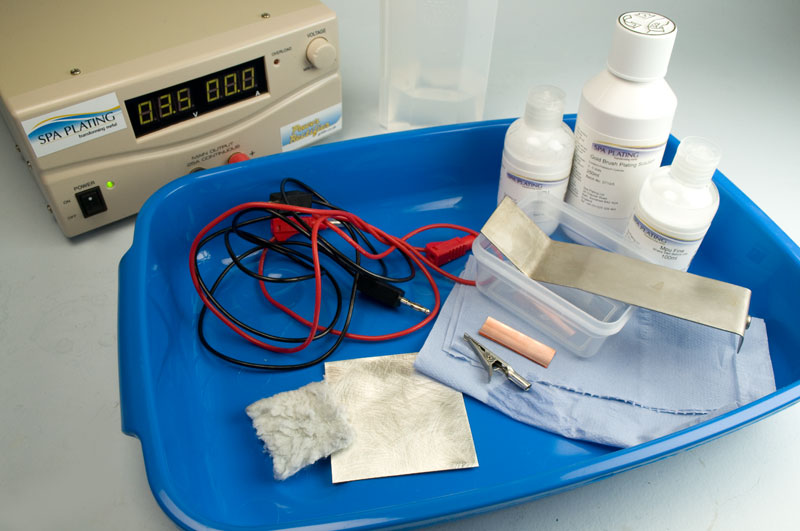
Equipment; MF Rectifier Mk II, Economy Plating Rectifier, Red Lead, Black Lead, Crocodile Clip, Conductor Strip, Flat Platinum Electrode, Flat Swab, Flat Beaker, Rinse Bottle
Solutions Gold Brush Plating Solution, MPU, MPU Fine, MetaSeal (depending on whether surface is matt or polished).
Click HERE for instructions for setting up our MF Rectifier Mk II for brush plating.
This project shows how to plate a larger flat surface and this is why the Flat Platinum Electrode and the Flat Swab has been used. If you want to plate a smaller surface area or the surface you are plating isn’t completely flat, then you should use the Platinum Electrode, the Electrode Handle and the Standard Swab.
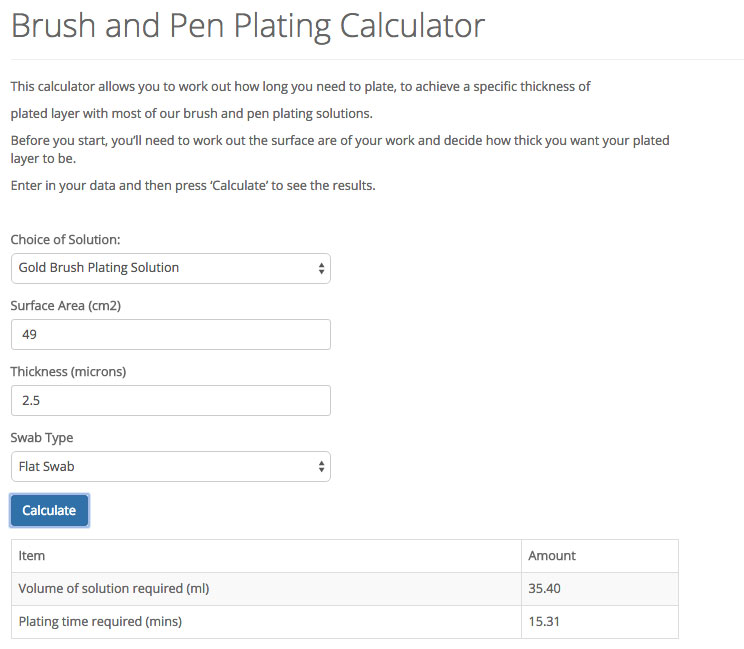
2. Working out how much Gold Brush Plating Solution you'll need
To work out how much solution you’ll need, first decide how thick you want your plated layer to be. For a thick layer of gold that will stand up to reasonable wear for a year or two, for example on a ring, you’ll need a layer of about 2.5 microns. This thickness of gold plate is referred to as Vermeil. However, if the item to be plated is for decorative use only and will not be regularly touched, then a layer of about 0.5 microns should be sufficient.
You also need to calculate the surface area of your work. The surface area of regularly shaped, flat items, such as the one being plated in this guide, are quite easy to work out. With curved and complexly shaped items, please see our video on the right on how to estimate the surface area.
Once you have the desired thickness of plate and the surface area, please go to our Plating Calculator which can be found on the main menu at the top of each page of our website. Select the Brush/Pen Plating Calculator and then enter in the required information. Press the ‘Calculate’ button and take a note of the results. The surface area of the piece of silver that’s plated in this demonstration is 49 centimetres squared and the desired thickness of plate is 2.5 microns. The volume of solution required is therefore about 35 millilitres and the plating time is about 15-16 minutes.
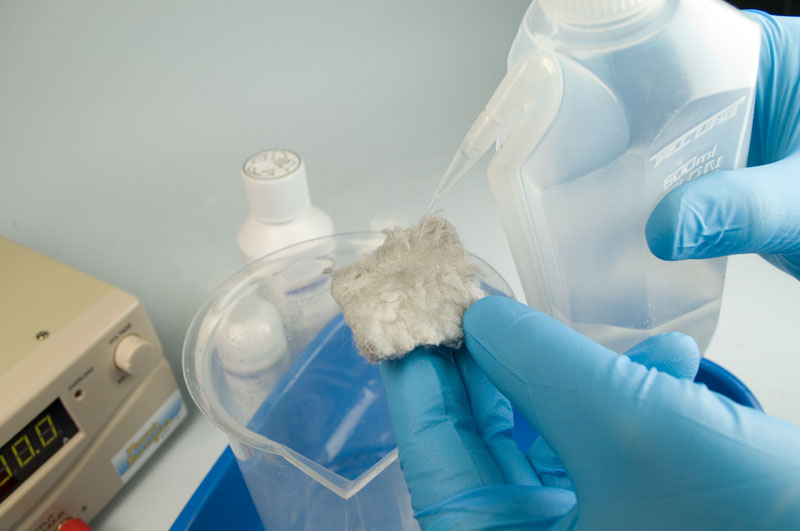
3. Preparing the gold solution
Pour out the calculated amount of gold solution into the beaker.
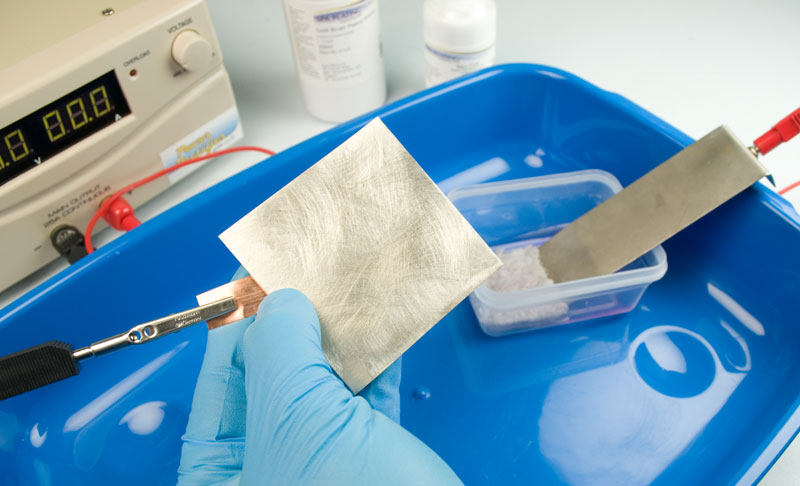
4. Connecting the red and black leads
Plug the red and black leads into the corresponding ports on the rectifier rectifier. For instructions for setting up the MF Rectifier Mk II, please click HERE.
5. Preparing the swab
Wet the swab thoroughly, squeeze out the excess moisture and slip it on to the Flat Electrode.
6. Connecting the electrode
Plug the other end of Red Lead into the port at the end of the electrode.

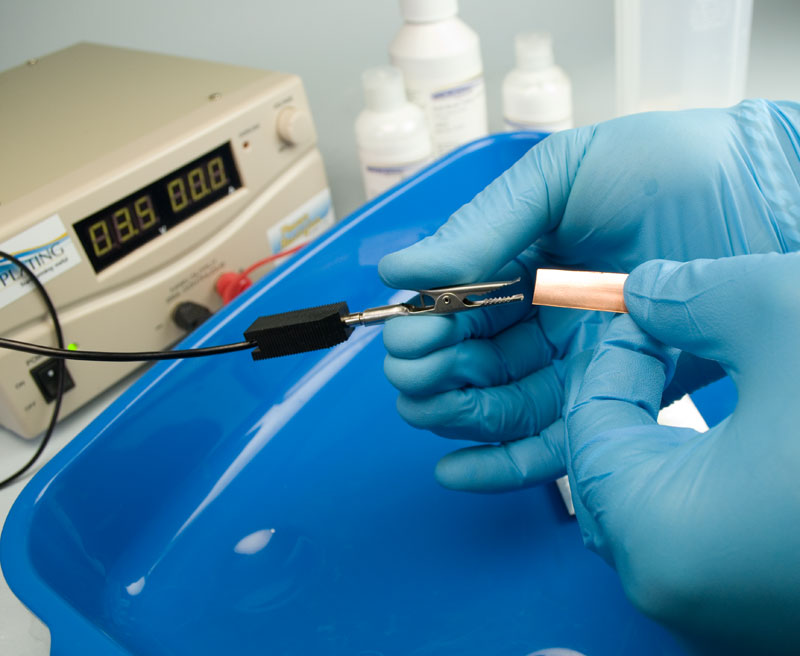
7. Connecting the conductor strip
Slip the Crocodile Clip on the the other end of the Black Lead and grip the Conductor Strip in the clip. The Conductor Strip avoids the danger of scratching your work with the stainless steel crocodile clip.
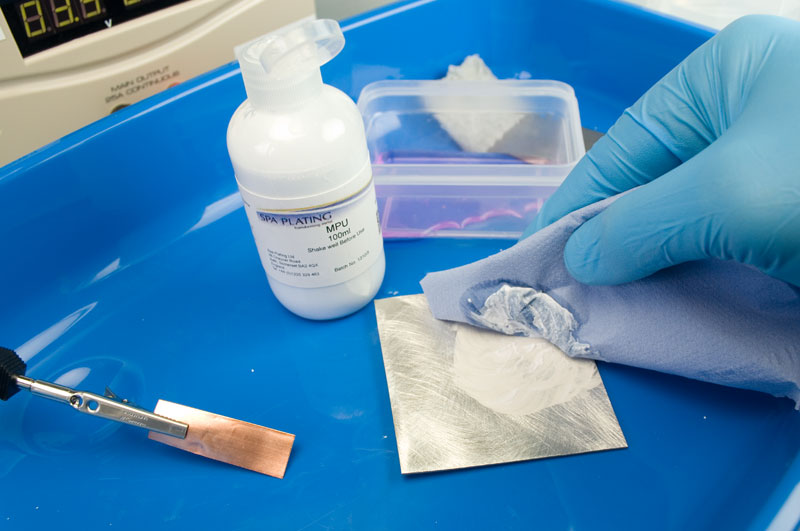
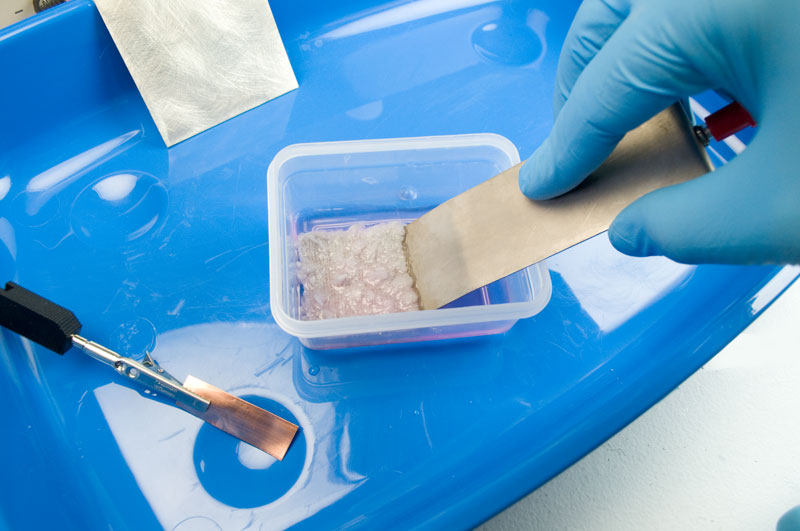
8. Preparing the surface of your work
With a clean piece of tissue, rub the surface of your work with the MPU. Keep rubbing until the surface is dry. Remove all traces of MPU with another piece of clean tissue; it isn’t necessary to rinse it off with water.
Your work is now ready for plating. Spa Plating’s MPU cleans and activates all in one and has been developed specifically for our plating process.
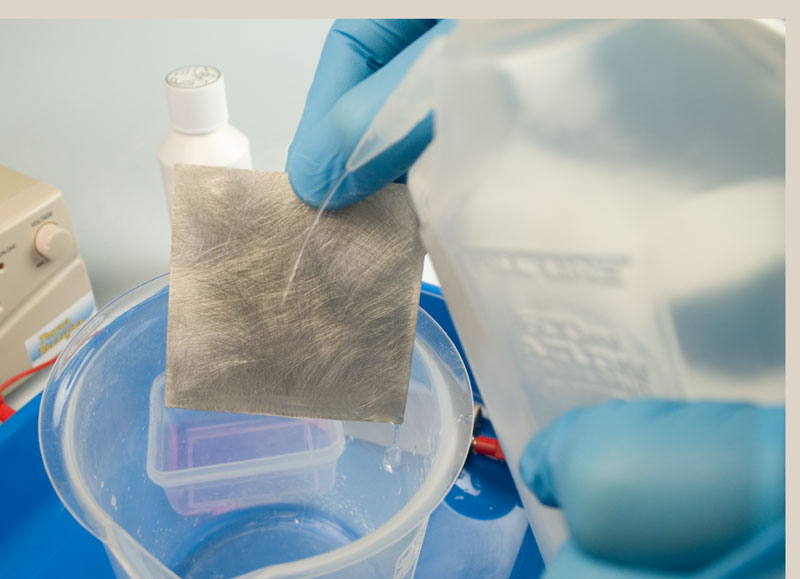
9. The water break free test
If you want to test how ready your work is for plating after the MPU stage and to make sure this stage has been correctly carried out, you can do the water break free test. Run water over the surface of your work and if it runs off in one complete sheet, without forming rivulets and droplets, then the surface is completely clean and ideal for successful plating. However if the sheet of water breaks up and droplets and rivulets form, you will need to repeat the MPU stage.
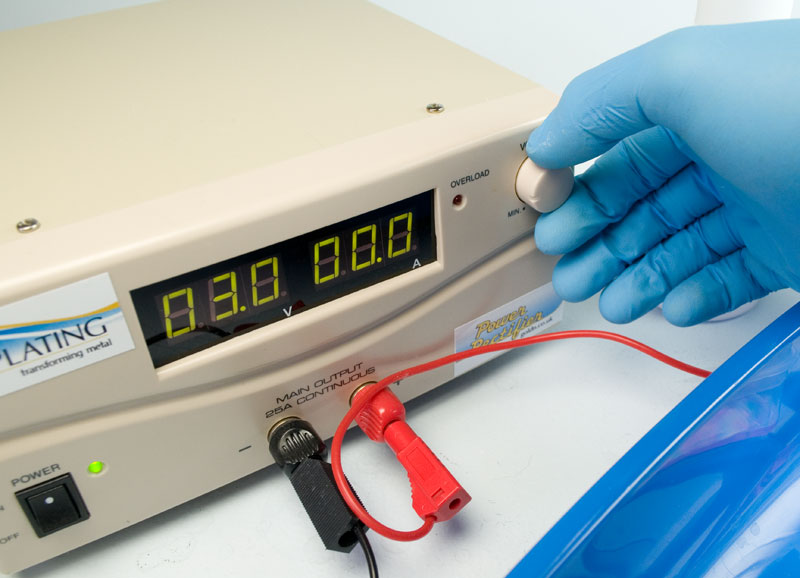
10. Selecting the voltage
The correct voltage range for all of our plating solutions can be found on the side of the bottle. In the case of Gold Brush Plating Solution the operating range is 3-5 volts, so select 3 volts on the rectifier.
11. Charging the swab with plating solution
Immerse the swab in the gold solution. Make sure the swab is thoroughly soaked and keep dipping the swab in the plating solution at regular intervals throughout the plating process to ensure the gold is replenished.
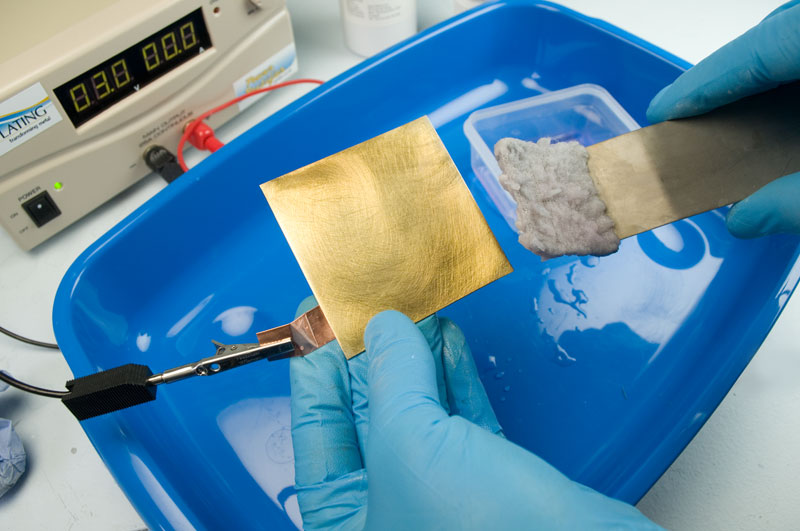
12. Holding the work
Hold the work firmly in one hand, making sure the Conductor Strip is in full contact with the item you are plating.
13. Gold plating
Start plating by brushing the surface of your work with the swab in regular, circular movements. Try not to let the swab rest against the surface of the work without moving, as this will result in patchiness of plate. Keep plating until the time is up. Rinse thoroughly under running water.
14. Finishing
To finish your work, we recommend using our MPU Fine on matt surfaces. If the surface of your work is highly polished, we recommend our MetaSeal.
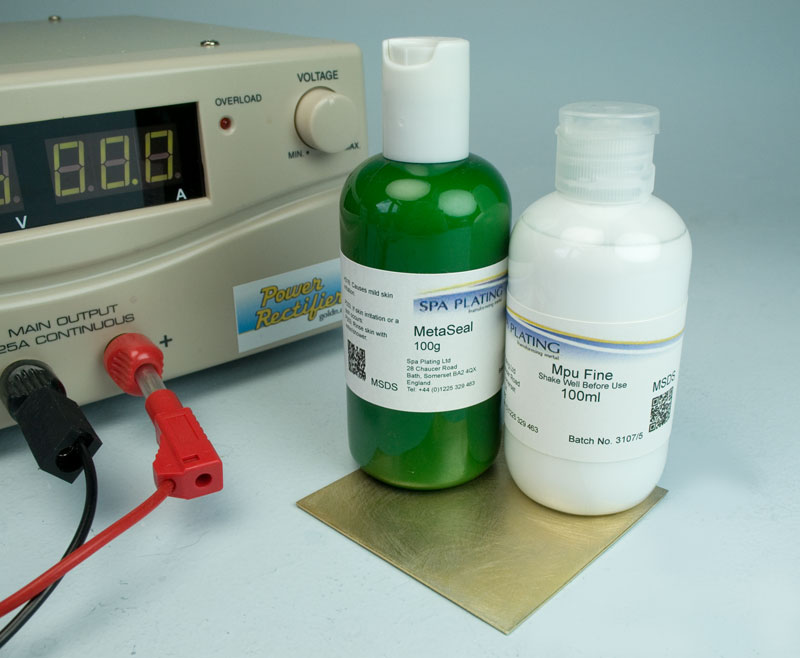
Our MetaSeal is used for bringing out the final lustre on your plated item. It also helps to protect the surface from grease and tarnish.
Leave a Reply
You must be logged in to post a comment.