Gold pen plating stainless steel electrical connections
Gold pen plating stainless steel electrical connectors on a photomultiplier
Gold plating using the pen plating process is ideal for connections in electrical equipment as the pen equipment is small enough to precisely plate the gold in restricted areas. This guide features gold pen plating the stainless steel connector pins in a photomultiplier. It is an extremely sensitive detector of light in the ultraviolet, visible, and near-infrared ranges of the electromagnetic spectrum and is widely used in medical, astronomical and particle physics research. Gold pen plating will optimise its performance, by enhancing its corrosion resistance in humid environments.
When plating any kind of electrical equipment, a vital consideration is avoiding moisture penetrating its workings and inhibiting the flow of electricity. The project shows how to get round this problem by using out Thickener, which stops your solution from dripping and running off.
Please note: The Rectifier shown in this project has now been discontinued and replaced by the MF Rectifier Mk II.
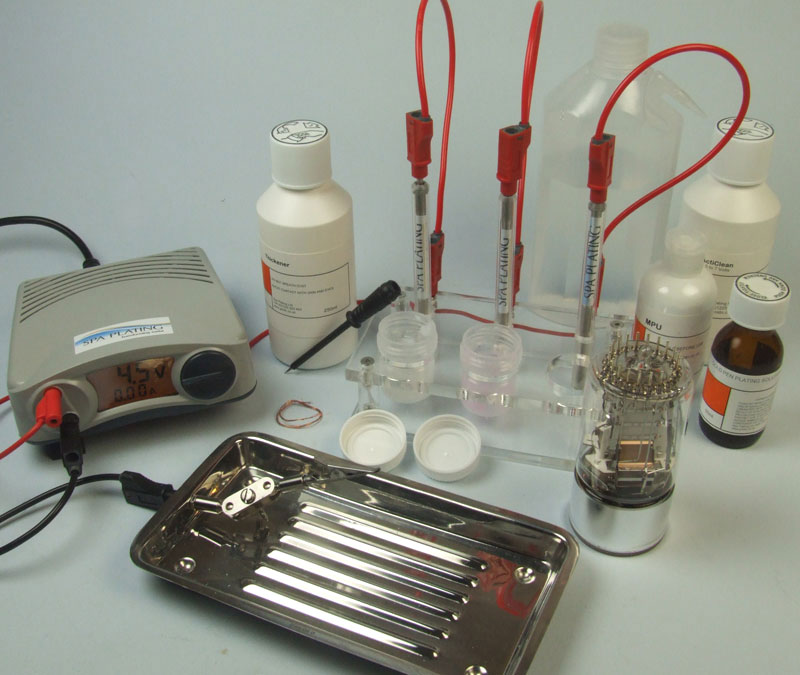
1. What you’ll need
Equipment; MF Rectifier Mk II, Pen and Beaker stand, Plating Pens, Mini Contact Probe, Pen Nibs (pointed and paddle shaped), fine gauge copper wire, .
Solutions and Materials; Thickener, ActiClean, Gold Pen Plating Solution, rinse bottle with deionised water.
NB Click HERE for instructions on setting up the MF Rectifier Mk II for pen plating.
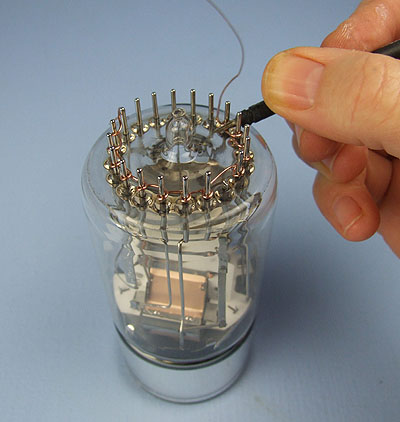
2. Preparing the photomultiplier - wiring up
Begin by cleaning the wire thoroughly with MPU and a piece of clean paper towel. Secure one end of the wire by wrapping it around one of the contacts and then proceed to weave/loop the wire in and out of the rest of the contacts, to form a continuous electrical link. This will save you a lot of time and hassle having to touch the black negative lead as well as the pen nib to each connector.
The mini contact probe is really useful for keeping the wire down against the glass and preventing it from slipping back off the connectors.
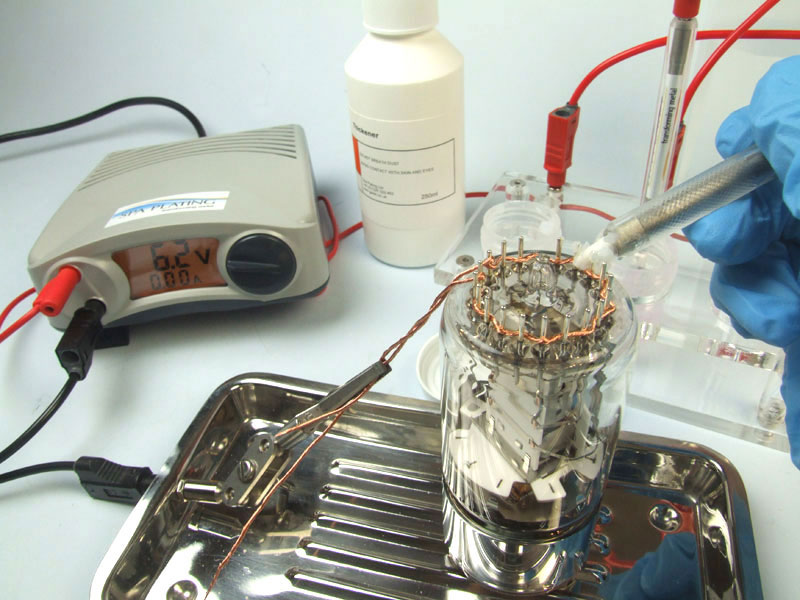
3. ActiCleaning 5 - 7 volts
Prepare the ActiClean by gelling it with the Thickener; this will prevent it from running all over your piece of equipment. For guidance on how to prepare Thickener, please see our guide in this manual. Grip one end of the copper wire with the crocodile clip, and ActiClean each connector in turn.
Once you have finished, wipe off any excess gelled ActiClean with a clean paper towel and rinse lightly with the deionised water.
4. Gold plating 5 - 6 volts
Gel the gold pen plating solution and adjust the voltage for gold pen plating. Plate each connector for approximately 30 seconds. Repeat the cleaning process outlined in the previous step.
Please see our guide to using the Battery Plating Pen with advice correct placement of the Nib into the end of the Plating Pen.
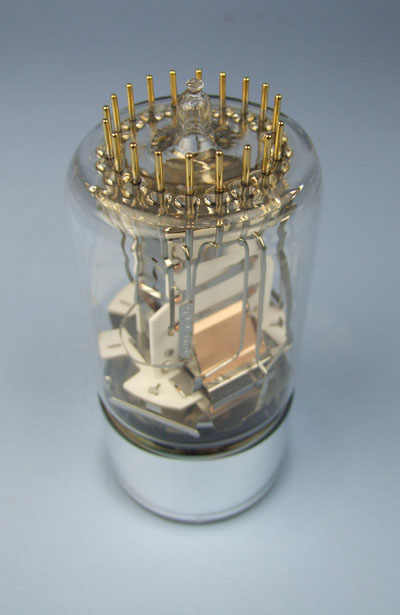
5. Finished photomultiplier
5Finished photomultiplier Don’t worry if you were unable to plate right down to where the connector enters the glass. The aim of the gold plate is functional rather than aesthetic; it is there to aid connectivity and is therefore only critical at the ends of the connectors rather than at their base.
Leave a Reply
You must be logged in to post a comment.